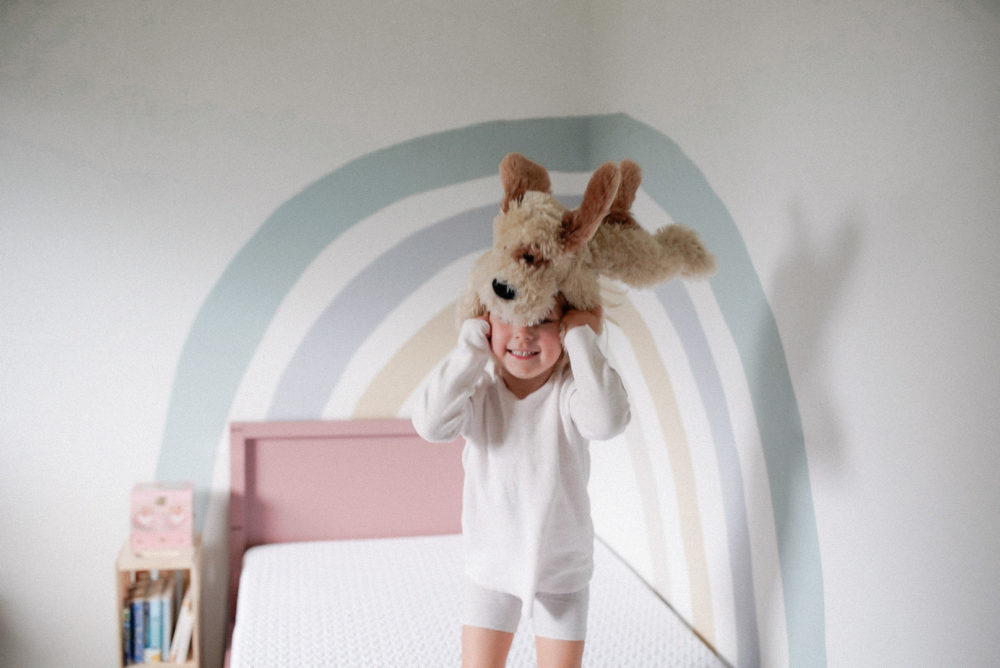
A little while back now I was browsing Pinterest looking for ideas for the girls bedroom and I came across a gorgeous rainbow wall (see it here). I love how it extended from one wall onto the next and the non-traditional rainbow colours. This very much inspired the DIY rainbow wall mural.
I shared a cool behind the scenes video on IGTV (you can watch it here) where you can see the process of it coming together. It’s also fun to watch cause the kids were coming and going, helping with each colour.
Photography: Fourth West Photography


A few people commented on my post how great it was that I let them help. It really was cool to see them get involved. I had to take a few deep breaths and I had a wet cloth on hand to wipe away any paint that made it on the wrong side of the tape, but at the end of the day, I was so glad they got to be a part of it.
Their eyes lit up when it was all done. Something fun that they got to be a part of was painted on their bedroom walls and they LOVE it. Bonus: So do I!
We updated the girl’s mattresses to Endy mattresses, which motivated the full room refresh and as you can tell they are LOVING it! You can read a full blog post review on how we feel about our Endy, we’ve been sleeping on it for over two years now and still feel the same way (read review here).
Disclosure: This post contains affiliate links — It doesn’t make any difference to you, though it does help me earn a little income if you purchase through the link.

How to Make Your Own DIY Rainbow Wall Mural
Materials I Used:
- Painters Tape
- Paint
- Wide 2 inch paint brush
- Small paintbrush for touchups
- Wet cloth
- Old Sheet
How to Make Your DIY Rainbow Mural Wall:
- Lay down an old sheet to cover your flooring. You might think you won’t drip, but trust me. It happens.
- Use the painters tape to line up where you want your rainbow. I started at the corner and worked my way down to the floor. Press your thumb down along the inside of the tape where the tape will be to create a smooth line, the outer edge is ok if it folds over.
- *TIP: Paint the original wall colour over the tape where you will be painting the rainbow colours to avoid the paint from bleeding underneath. Let dry
- Paint each colour, dry, paint again and repeat until done. Use your wet cloth to wipe away any paint that gets outside of where you want it.
- Remove painter’s tape
- Use your small paintbrush to touch up any spots that may have ran or been uneven.
- Let dry and Enjoy!
Watch a TimeLaspe of How We Created it on TikTok: Here

Paint Colours I used for the DIY Rainbow Mural Wall
Paint Brand: Deco Art Americana Decor Chalky Finish – 8 fl oz
First Colour: Retro ADC17
Second Colour: Yesteryear ADC27
Third Colour: Timeless ADC04
Last Colour: Primitive ADC26
It took me about half the day to start and finish this DIY project and it completely revamped the girl’s room into something new.
Make sure to share with me if you create a DIY rainbow mural wall, I would love to see it. Tag on Instagram @creativewifeandjoyfulworker and Facebook /creativewifeandjoyfulworker.

[…] grew the pumpkins in our garden and I painted them with left over paint from the mural Rainbow Wall that I DIY’d in the girls bedroom earlier this year. After letting the paint dry I used letters from my letter board to create a […]