


So last week when I was trying to think of another DIY to add to our Kid’s Spring Style and Geo Floral Easter Party, DIY gold foil Easter eggs came to mind. First though, those will be super simple. Reality, gold foil is a pain to work with. Just wanted to get that out there, you know if you are having those, this is going to be easy thoughts. Also I am sure that I am not the first person to write this post…. and that is another mistake I might add… why did I not google how to do it by someone else? I tried MULTIPLE ways to get the foil to stick and then after like the fifth try, voila! It worked!
I made these eggs specifically for the little DIY Baby Bird Nests that I made a few days before. I thought they would be perfect inside the nests scattered amongst the table. Well, my mom brain forget the nests at home the day of the shoot, but they still looked great scattered within the floral table runner created by Sequel Events.
YOU MIGHT ALSO LIKE: Easter Egg Colouring and Activity Sheet (coming soon)

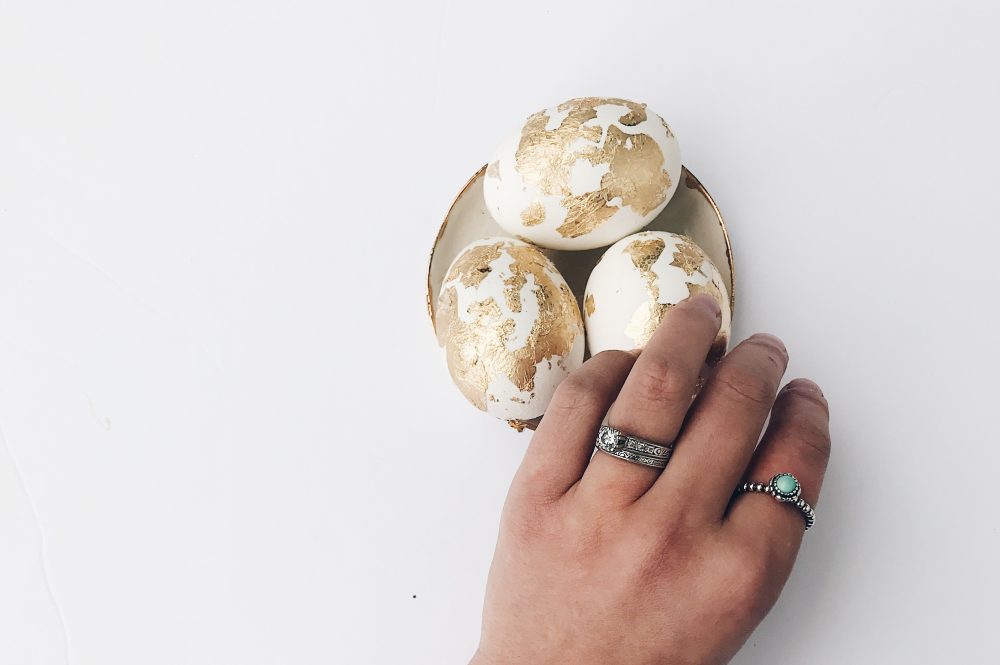
DIY Gold Foil Easter Eggs
Supplies
- Hard boiled Eggs (or faux eggs)
- Gold Foil (mine is from Michael’s with a 40% off coupon, whoop! If you don’t already know this they always have coupons online to save $$)
- Paint Brush
- Liquid Clear/White Glue
Directions
- Use your paint brush to paint on glue to your eggs. Cover the areas that you want the gold foil to stick to.
- Roll the glued on areas of the egg directly onto the gold foil. This will have large pieces and smaller pieces on your egg.
- Once the amount of gold foil that you want is on your egg, use your paint brush to manipulate the foil.
- You can softly stroke more glue on top of the foil very gently if you want the gold to stay in larger pieces. If you prefer the gold foil to be broken up into smaller pieces poke the foil with the end of your brush to break it apart. More glue will have the foil move around easier.
- To fill in spots that didn’t collect foil dab your paintbrush onto the gold foil sheet to collect small pieces to paste on.
- Let dry on a drying rack (not a hand towel, trust me on this one).


Have fun with it and I can’t wait to see how they turned out. If you use this DIY share it with us by tagging #cwandjwDIY on Instagram or Twitter. Happy decorating!
[…] DIY Gold Foil Eggs: Creative Wife and Joyful Worker blog post link […]
[…] soon. Geometric Party Plates, Blush Tablecloth, Wooden Forks: Joonie and Joe DIY Gold Glitter Eggs: Creative Wife and Joyful Worker blog link Easter Egg Macarons: Sugar Patisserie DIY Watercolour Easter Egg Banner: Creative Wife and […]
[…] YOU MIGHT ALSO LIKE: DIY Gold Foil Easter Eggs […]
[…] up on with Creative Wife & Joyful Worker (where you’ll find her DIY for making those gold foil eggs) and Discovering […]
[…] YOU MIGHT ALSO LIKE: DIY GOLD FOIL EASTER EGGS […]